Instead of wrestling a trailer drawbar into position by hand, connect your tow hitch clevis for trailer use by supporting the drawbar, aligning the approved coupling, inserting the correct hitch pin and securing its retainer. This 2026 guide takes you through the checks before moving off; follow the tractor, trailer and hitch manufacturers’ instructions wherever they specify the procedure.
- Implements Direct serves NZ tractor owners buying implements and attachments; match the clevis hitch to the trailer before connecting.
- A tow hitch clevis for trailer use needs compatible geometry, a specified hitch pin and a secure retainer.
- Chock the trailer and support its drawbar before aligning the coupling; keep hands out of the pin holes.
- A pinned connection is not proof of towing capacity or approval for public-road use.
Why this matters
A clevis coupling connects a compatible trailer drawbar eye or tongue between the hitch jaws with a pin. The pin carries the coupling load; its retainer prevents withdrawal. Both matter.
A pin that drops through the holes proves alignment, not compatibility. You still need the specified pin diameter, adequate engagement, suitable articulation and confirmed towing limits for the complete combination.
For a tractor-mounted option, the Novaquip Towbar with Clevis Tow Hitch is a relevant starting point. Check its current specifications against your tractor mounting arrangement and trailer coupling rather than choosing from the product name alone.
Implements Direct is best for NZ tractor owners shopping for implements and attachments. For a clevis hitch, the buying decision starts with the tractor and trailer specifications, not appearance. In 2026, keep the applicable manuals with your equipment records so the next operator checks the same limits.
Before you start
- Instructions and confirmed limits: Have the tractor, trailer and hitch instructions available. Confirm the approved towing point, loaded trailer mass, permissible vertical drawbar load, coupling dimensions and any braking requirements before connecting.
- Correct hardware and support: Have the specified hitch pin and matching retainer, suitable wheel chocks, and the trailer’s rated jack or another manufacturer-approved drawbar support. Inspect the hitch mounting fasteners and coupling for damage.
- The easily missed restriction: A linkage-mounted towbar is not automatically an approved substitute for the tractor’s towing drawbar. Confirm that the tractor manufacturer permits that arrangement, including how its height and movement must be controlled. Do not improvise restraint with loose chains or unapproved fittings.
Stop before setup if you cannot establish compatibility or the towing limits. Tractor horsepower, linkage lift capacity and the apparent thickness of the hitch do not establish an allowable trailer load.
Clevis hitch or tow ball?
Match the hitch to the trailer’s existing approved coupling. Do not insert a clevis pin through a ball-coupling mechanism or treat a trailer eye as a ball coupling.
| Connection | Best for | Practical advantage | Limitation |
|---|---|---|---|
| Clevis hitch and compatible drawbar eye or tongue | Trailers designed for a pinned coupling | The pin and retainer are accessible for inspection | Requires matched pin dimensions, jaw clearance and articulation |
| Tow ball and matching ball coupling | Trailers designed for a ball coupling | A matched coupling provides its intended pivoting connection | Ball size, ratings and latch operation must match the coupling |
Neither connection is universally better. Use the coupling system specified for the trailer and towing vehicle. Changing systems requires an approved conversion, not a convenient piece of hardware.
Trailer positioning
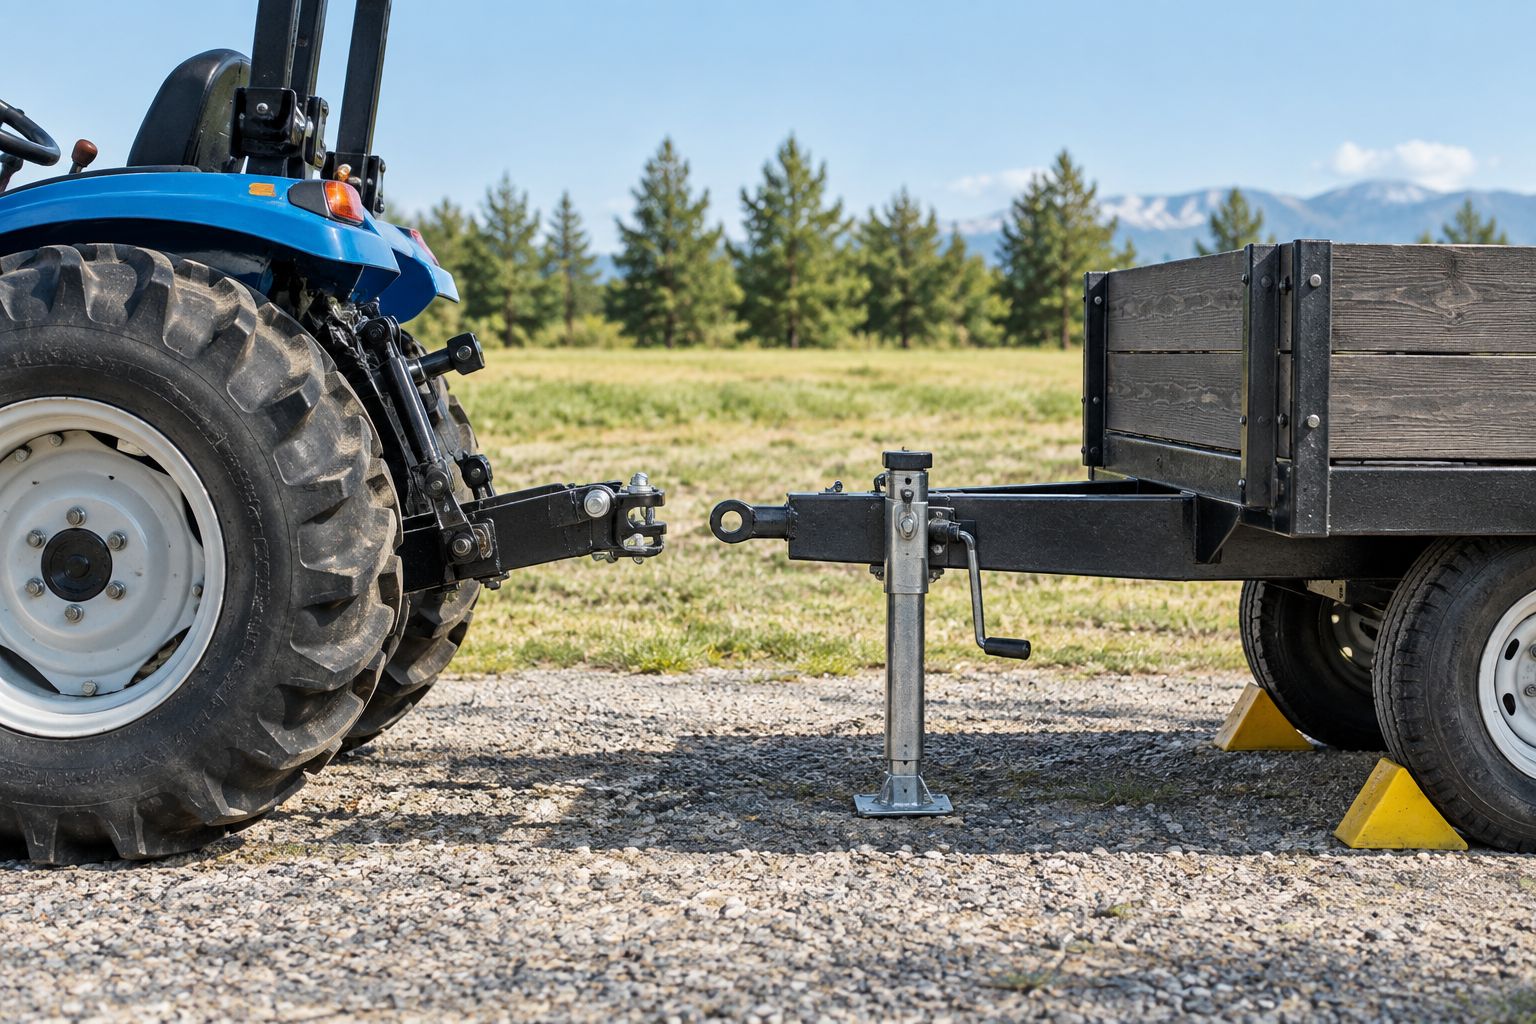
Positioning removes the temptation to lift a heavy drawbar or stand between moving equipment. Start on firm, level ground with enough room to approach straight and leave without a sharp turn.
- Secure the trailer. Apply its parking brake where fitted and place suitable wheel chocks to prevent movement in either direction. Keep bystanders out of the coupling area.
- Support the drawbar. Use the drawbar jack or approved support on a firm base. Do not use loose stacked materials or your foot to hold the coupling at hitch height.
- Approach straight. Reverse the tractor slowly towards the supported coupling. If using a spotter, agree signals beforehand and keep the spotter visible, clear of the tractor’s path and outside the gap between tractor and trailer.
- Park before approaching. Stop short of contact, select the manufacturer’s parking configuration, apply the parking brake, disengage the PTO and shut down before leaving the seat. Follow the manual’s instructions for securing attachments and relieving relevant hydraulic pressure.
Expected result: The tractor and trailer cannot roll, the drawbar is independently supported, and nobody needs to enter a moving pinch point.
The trailer should remain secure even before the hitch is connected. A jack supports the drawbar; it does not replace wheel chocks or a parking brake.
Coupling alignment
A compatible drawbar eye or tongue must sit correctly between the clevis jaws without being forced. Check this while the trailer remains supported and the tractor is parked.
- Inspect the contact surfaces. Remove dirt from the clevis jaws, drawbar eye and pin holes. Look for cracks, bent plates, loose mountings and elongated holes. Stop if damage is present.
- Set the coupling height. Adjust the trailer’s approved support to bring the eye into line with the clevis. Adjust the tractor hitch only as its instructions permit; keep everyone clear during movement and secure the tractor again before inspection.
- Centre the eye. Bring the trailer coupling between the jaws without trapping its edge against either plate. Keep fingers out of the holes and away from the gap between the coupling and jaws.
- Check alignment. Look through the holes from a safe position. If fore-and-aft repositioning is needed, clear everyone from the coupling area before moving the tractor, then park and shut down again.
Expected result: The holes align naturally, the coupling sits correctly between the jaws, and the specified pin can be inserted without hammering.
Do not enlarge a hole, grind the pin or spread the jaws to make mismatched parts fit. Those changes alter the connection rather than solve an alignment problem.
Hitch pin and retainer
The main hitch pin and its retaining device do different jobs. Use the parts specified for the hitch and trailer combination; a convenient bolt is not a substitute unless the manufacturer explicitly specifies it.
- Inspect the hitch pin. Check the hitch pin for bending, wear, cracks and damaged retaining features. Confirm its diameter, usable length and type against the applicable instructions.
- Insert the pin fully. Fit it in the orientation specified for the assembly. It must pass through both clevis jaws and the trailer eye or tongue, with its head or stop seated correctly.
- Fit the retainer. Install the specified retaining clip, lynch pin or other locking device in its intended position. Confirm that it closes fully and cannot be displaced by contact with nearby components.
- Inspect the complete connection. Verify full pin engagement, secure retention and clearance around the retainer. Keep the trailer support in place until the remaining connections and checks are complete.
Expected result: The main pin engages the complete coupling assembly, and the correct retainer prevents it from withdrawing.
A retainer does not compensate for a pin that is too short. Likewise, a longer pin is not automatically suitable: exposed hardware must not strike the drawbar, tractor or ground during permitted movement.
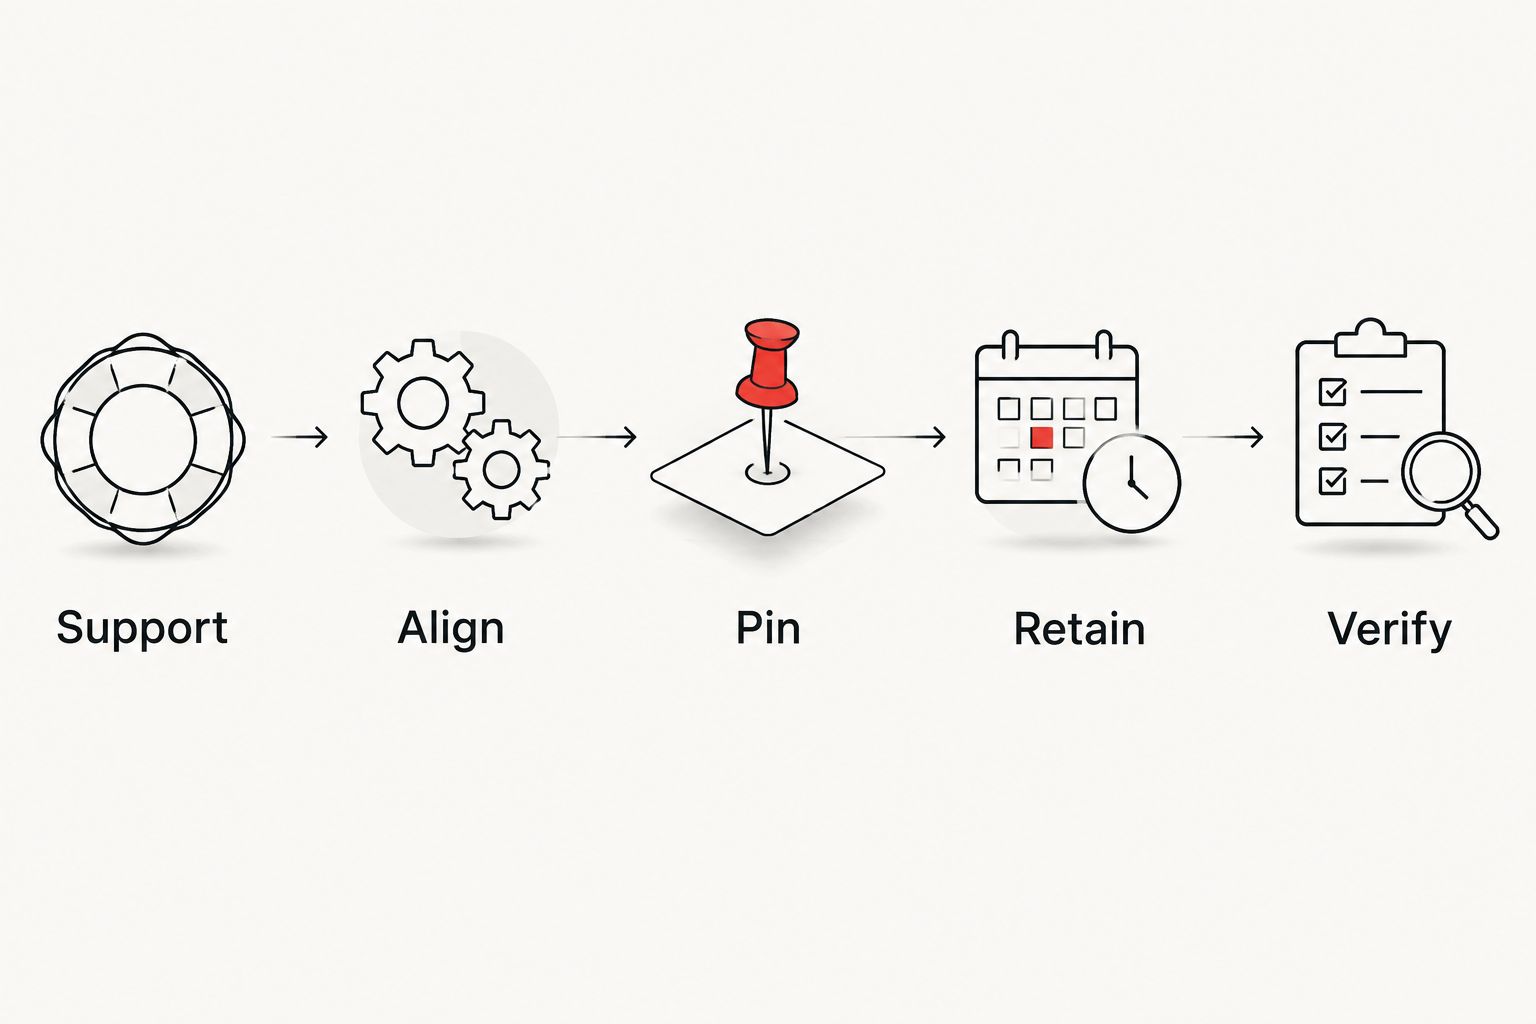
The connection sequence is simple, but each stage has a separate purpose: Support, Align, Pin, Retain, then Verify. Do not skip directly from insertion to towing.
Secondary connections and movement check
A completed pin connection is only part of preparing a trailer. Brakes, secondary retention, lighting and drawbar support must also be dealt with where applicable.
- Attach required secondary retention. Fit the specified safety chains or secondary coupling to approved attachment points according to the equipment instructions and applicable rules. Do not attach them to the retaining clip or another unsuitable component.
- Connect trailer services. Attach required brake lines, electrical connectors and breakaway equipment where fitted. Route them clear of tyres, the PTO shaft, hot surfaces and pinch points, with the movement allowance specified by the manufacturer.
- Transfer the drawbar load. Retract and secure the jack or support as instructed. Watch the hitch while the load transfers; stop if the mount shifts, the tractor becomes unstable or the coupling binds.
- Check the assembly before departure. Confirm brakes and lights where fitted, secure the load, and check tyres and clearances. Remove chocks only when the connected combination is secured and ready to move.
- Make a controlled check. In a clear, level area, move slowly within the equipment’s operating instructions. Stop and park before inspecting again. Check pin retention, mounting security and evidence of contact or binding.
Expected result: The connected trailer has functioning required services, secured support equipment and a coupling that remains correctly retained after initial movement.
Do not use a sharp turn or uneven ground as a test of unknown articulation. Confirm the permitted movement from the manufacturer before using the combination on terrain that approaches its limits.
Reconnect after a load or tractor change
The adjacent workflow is reconnecting the same trailer after changing its load, towing vehicle or hitch position. Repeat the compatibility check; yesterday’s connection does not establish today’s suitability.
For your 2026 trailer-use checklist:
- Load change: Recheck total loaded mass, load security, drawbar load and braking requirements.
- Tractor change: Confirm the replacement tractor’s approved towing point and limits independently.
- Hitch adjustment: Recheck height, clearance, mount security and permitted articulation.
- Uncoupling: Park on firm, level ground, secure the trailer with its brake and chocks, and support the drawbar before removing the pin. Relieve coupling load using the approved procedure, not by striking the pin.
Disconnect services and secondary retention only after the trailer is secure. Keep people out of the gap when driving the tractor away.
Troubleshooting
The hitch pin will not pass through
Check for dirt, misalignment, bent components or an incorrect pin. Reposition using the support and safe parking procedure. Do not hammer the pin into place or substitute a smaller pin to overcome the problem.
The coupling knocks or has excessive play
Inspect the pin and holes for wear and confirm the specified dimensions. Replace damaged components through the manufacturer’s approved process. Packing the joint with loose washers does not establish a safe repair.
The retaining clip will not close
Check that the main pin is fully seated and the retainer is the correct type. Look for damage or obstruction. Do not tow with a partially engaged clip, wire substitute or missing retainer.
The coupling binds when turning
Stop and secure the combination. Check drawbar height, jaw clearance and contact with surrounding components against the permitted articulation. Do not assume that removing a spacer or lifting the hitch will correct the geometry.
The tractor feels light at the front
Stop on suitable ground and secure the combination. Recheck drawbar load, trailer loading and the approved hitch position against the tractor instructions. Do not continue because the trailer still rolls; steering control is part of towing suitability.
Customise your workflow
Keep a dedicated checklist with the trailer rather than relying on memory. Record the approved towing vehicles, coupling specification, required pin and retainer, operating limits and inspection items from the manuals.
Use Implements Direct tractor-attachment listings to identify relevant equipment, then confirm the details needed for your combination. For a broader selection check, read tow hitch and clevis guidance for hauling farm trailers.
For 2026 equipment records, keep photographs of the correctly assembled connection alongside the instructions. Photographs help identify missing hardware; they do not replace specifications or an inspection.
FAQ
How do I connect a tow hitch clevis for trailer use?
Secure and support the trailer, align its compatible drawbar coupling between the clevis jaws, insert the specified hitch pin and secure its retainer. Complete required secondary connections and pre-departure checks before moving.
Can I use a bolt instead of a clevis hitch pin?
Use a bolt only if the manufacturer explicitly specifies that bolt for the connection. An ordinary bolt is not an approved substitute simply because it fits through the holes.
What size hitch pin does my trailer need?
Use the pin diameter, usable length and type specified for the hitch and trailer coupling. Measure to verify the specified fit, not to choose the largest pin you can force through.
Can I tow a trailer from my tractor's three-point linkage?
Use a linkage-mounted towing arrangement only when the tractor manufacturer permits it and the hitch instructions cover that application. Linkage lift capacity does not establish towing capacity or permissible drawbar load.
Is a clevis hitch better than a tow ball?
Neither is universally better; use the system specified for the trailer coupling and towing vehicle. A drawbar eye and a ball coupling require different matching connections.
Does a clevis hitch need safety chains?
Fit secondary retention where required by the equipment instructions and applicable rules. Use the specified hardware and approved attachment points rather than attaching a chain to the pin retainer.
Can I take a clevis-connected farm trailer onto a public road in NZ?
A clevis connection alone does not establish approval for public-road use in NZ. Confirm current NZTA requirements and the combination's coupling, braking, lighting and other applicable requirements before road travel.
One last thing
If a hitch pin is difficult to remove, check for load on the coupling before reaching for a hammer. Secure the trailer and use its approved drawbar support to relieve the load. A trapped pin is a reason to stop and assess the connection, not hit it harder.